
How I came to build my first boat - part 2
By Thomas Mauer #537 "Water Dancer" (2ea 2ad 12ar)When I decided that we needed to build a PD Racer I was just coming into the final stretch of completing two college degrees that I had been working on since I retired from the Navy. The idea being that I had not really had a homework free weekend in about four years and when I finished (in December 2010) my classes I would take at least a year off school to really reconnect with my son. What better way to do this than building a boat and teaching my son to sail. The community that seems to spring up around this boat was as much a factor in its building as is its ease of construction.
So I sat down with my son and we looked at photos of ducks. He was and still is very insistent that we be able to fish from the boat. In his mind the fishing is first, and the all that other stuff is just that… other stuff you could do with the boat if there were no fish. With that in mind while designing our boat it was important that we could row the boat, possibly put a small electric motor on it, and that we would have proper seating for sitting around waiting for the fish to show up.
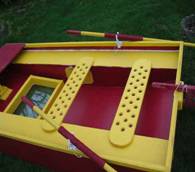
We both really liked the look of side airboxes that were lower than the side hull bulkheads were a good idea. I should note that my son also wanted a window in the bottom of the boat too and I refused on the grounds that it might not sail as well. There is no percentage in letting him know I wasn't sure I could pull off the window without messing up the hull.

I liked that we could just use the airboxes for seats and could remove the "rowing" seat if we wanted. I also wanted a front end box for the extra flotation and as a support for my mast sleeve. Then we thought a lifting seat in the rear would be an excellent place to store PFD's when not in use.
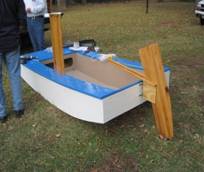
I've never used a leeboard and frankly think the daggerboard is cooler. So an offset daggerboard along the inside of the starboard airbox seemed a good idea, and this would let us strap oars to the outside of the boat, both ideas which would free up real estate inside the cockpit. So there you have it. Why the drawing turned out like it did.
Then I stopped lurking and started asking questions. The upshot of which is, I was talked out of trying to put in an auto-baler like on a Sunfish/Laser, was talked out of trying to make my initial sail out of a canvas drop cloth, I was talked out of a Junk sail for my initial sail, I was given excellent advice on adhesives, sail materials, and cutting techniques. My auto-baler question started a debate on putting holes into perfectly good hulls on very small boats. My Sail questions let to further discussions about foils which has since steered me to the leeboard idea. The Duckers of the world are not shy about giving advice or debating the finer points of small boat construction.
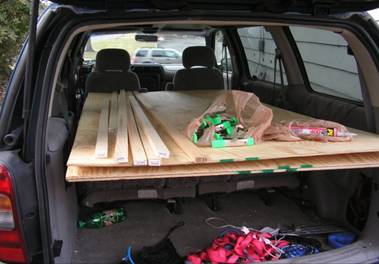
Armed with all this knowledge and my fist full of gift cards I went to the local big box to get some stuff to get started. I came home with three sheets of exterior plywood, 4 eight foot 1X2's, 2 eight foot 1X3's,6 six foot 1x2's, a six foot 1X6, four tubes of PL adhesive and 24 two inch spring clamps. I was sure that this small pile of wood would be enough to get me started.
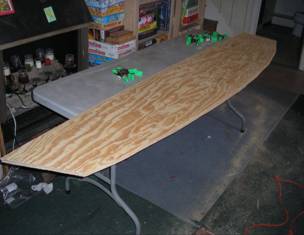
We hauled the wood into the basement and grabbed a pencil, tape measure, a carpenters square, our plans, and our binder and set to marking out the bulkheads and rocker shape. What we did first was to cut two pieces of plywood so they were 8' x 18" high and two pieces 8' x 15" high. Then I set up our folding table to hold the wood, looked at my circular saw, chickened out, grabbed my jig saw and very slowly and very carefully started cutting. In point of fact all the cutting I have performed I have done with the jig saw or a handsaw.
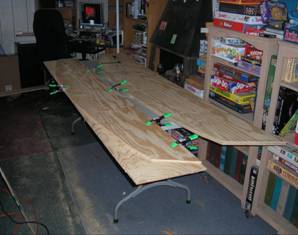
After we had our pieces I measured and marked out the points for the rocker shape then drove a finishing nail partway into the wood at those points. Not having a proper piece of trim or other long flexible bit of wood I drew strait lines from point to point and believe it or not it mostly makes a curved shape. After drawing my "curve" I clamped down the first board and started cutting. I then used the first board as a template to cut the rest of the bulkheads so that all of the imperfections of my curve were the same. I did this by clamping the boards together and then using my trust jig saw and steady hand to make sure they matched. Once all four boards were cut I clamped em all together then shaved off just a hairs breadth so that I could be sure they all matched.
Next time: Gluing on the chines, measure twice cut once, and pay attention to what your doing! (my first mistake)