
How I came to build my first boat - part 3
By Thomas Mauer #537 "Water Dancer" (2ea 2ad 12ar)Now I have these perfectly cut sides for my boat. Two 18 inch deep for the hull and two 15 inch deep for the side airboxes. They have the curve and we clamped them all together so we know they are all shaped exactly alike, aren't we smart! Aren't we clever! We are going to build the most perfect first boat anyone has ever constructed I can feel it!
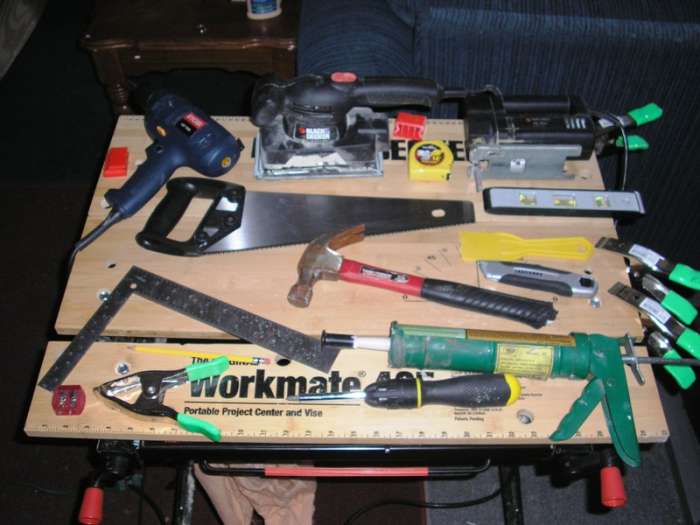
I'd like to take a just a moment and talk about the tools I have used so far in my build. They are few and simple. A Black and Decker workmate bench, a 5' table with folding legs (not pictured), a drill, a sander, a jigsaw, a handsaw, a screwdriver, a hammer, a utility knife, a level, a tape measure, a carpenters square, a caulk gun, a 2" plastic putty knife, and 20 or so 2" spring clamps. Oh, and a pencil and pencil sharpener (VERY important!)
I'm bringing up the tools to show that the tools required are few in number, and most people probably already have them in their inventory. I had to buy the clamps ($1 each at my local big box store) because I didn't have any, but everything else I already owned. The point I'm so laboriously trying to illustrate here is that you don't need special tools to build this boat. You don't even need a bunch of high end tools to build this boat. Sure I'd like to have some fancier tools with all the bells and whistles, and it would make some of my work easier and prettier to look at, but I don't NEED them to do the job.
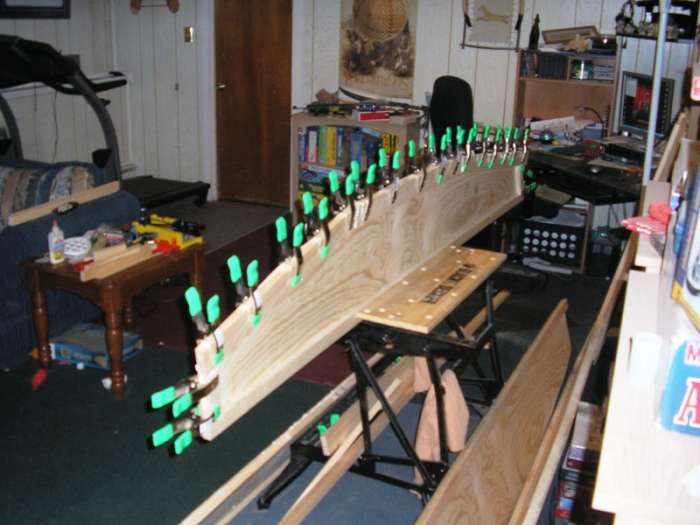
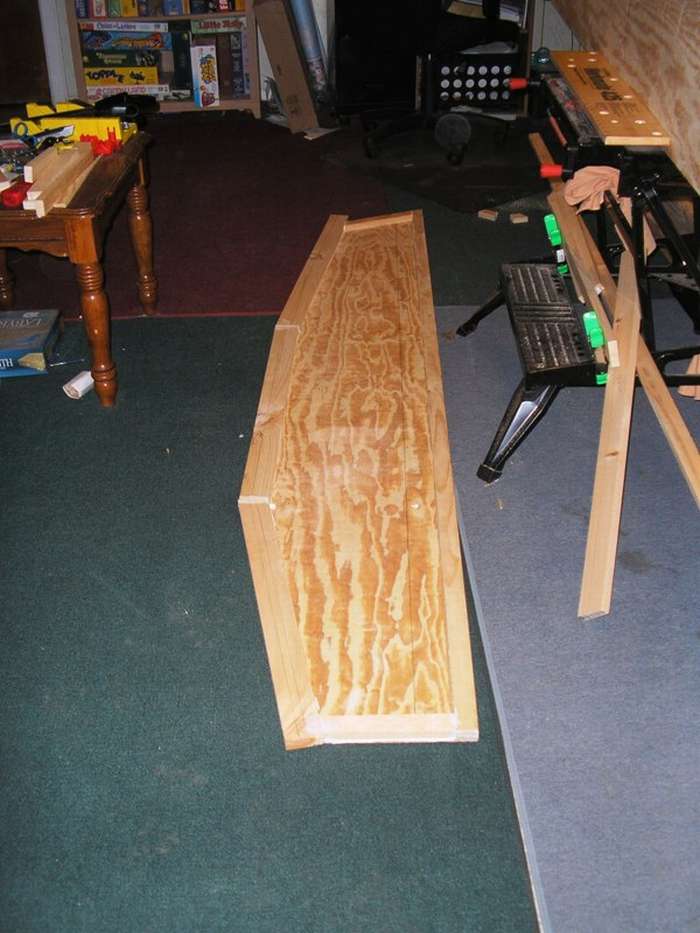
Back to our build… Now it's time to glue on those chines so we can attach the bottom and the decks and all the cool stuff that's gonna make our boat a boat. Glue is mostly inexpensive so we go with the theory that slathering it on thick and making sure we have good coverage is more important then being dainty. So that's what we do, lay it on thick. Then we use our clamps to hold those chines in place.
We used lots of clamps cause we wanted to be extra sure that the chines stayed where we put them. This of course caused our glue to ooze out the whole length of the chine. My experience with this is to be sure there is something under your workspace to avoid glue on the floor (or in the rugs), this will help keep things harmonious if your better half is dubious about all the noise, dust, and smells coming up out of the basement. Best not keep Mama happy, because when she's happy, we all are.

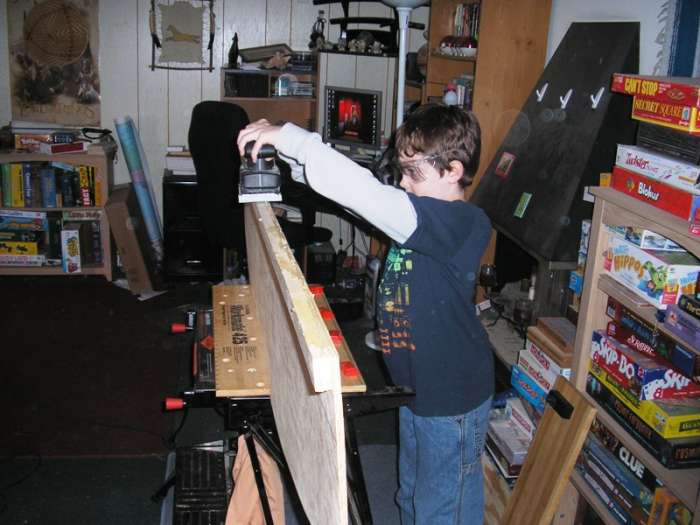
We used 1x2's for all the strait line chines, and 1x3's for the curve. To keep things simple we glued one top chine an evening with the board clamped into the workbench and allowed to glue to cure for 24hrs before removing the clamps. When the glue had cured for 3 days Vaughan got to use his first power tool. He sanded all the hard glue off and made sure everything was smooth.
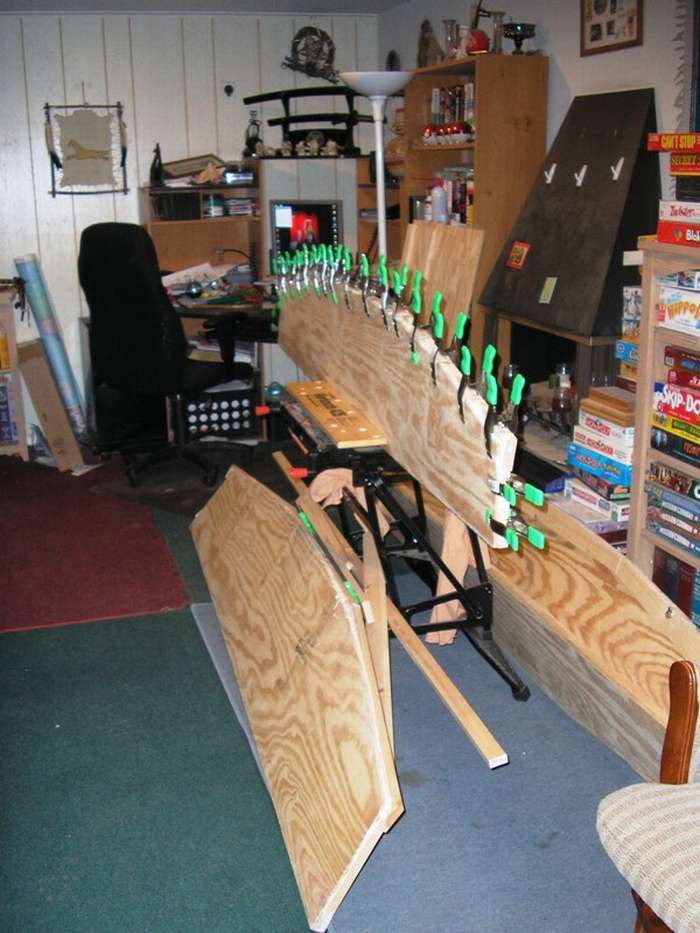
Then glued on the chines for the curve. We used 1x3's so we could glue them mostly strait and let the ends be off the bottom but still have the same coverage we had from the 1x2's on the strait bits. We cut the 1x3's into three sections and put in a slight angle cut on the two end sides leaving the middle strait. Then we glued them all down with a little bit of the chine extending beyond the plywood. Again we left them for a full day before removing the clamps and three days before we cut away the excess.
After cutting the all the parts of the chine off that didn't conform to our beautiful curved bottom, Vaughan once again got to show off his new electric sander skills making everything so smooth that you "can run your hand along the whole thing without getting a single splinter dad… try it." I did, and it was.
It was at this point in the construction that I made my first mistake. I had measured everything twice, marked it once, and was super careful in my cuts. I had used plenty of glue and given that glue ample time to set up and cure. What I didn't do was make sure that my chines were on the correct side of the wood. *face-palm* When I put the top chines on I wasn't paying attention and I put the top chines of the 18"hull pieces on the same side. Let me tell you, that glue, once it sets is awesome! When I tried to pry the chine off I just started to split the plywood and stopped. I set one the sides apart and cut a new one (using the original for a template) and made sure that I glued the chine on the proper side. I felt foolish but it taught me a lesson AND I ended up finding a use for that bulkhead later.
The lessons I took away from this part of the build are 1. As always have fun, and if your building it with your kids, keep 'em involved and make sure they're having fun too. 2. Glue is messy and it's easier to clean up wet than when it's cured. 3. Pay attention to your plans, gluing can be as dangerous as cutting and just as irreversible. 4. Don't throw out your scraps or your mistakes before the project is finished, you may have a use for that lumber later.
Next time: Going 3D, that awful cracking noise, and my second mistake.