
How To Measure PDRacer Hulls
Because of the unique shape of our boat and class rules, we can use a very simple method to measure the rocker shape of our hulls. It is sort of an unusual way, but after you "get it", you will see it is a very simple method that can be performed on a hull very quickly. It will take you more time to read this page than it will to measure a duck hull.
Basically we make a "string line" which is parallel to the line drawn on the plywood that we used when creating the rocker shape of the hull. Then we put the 6" part of the measuring tape on the string, and measure where the bottom of the hull is. To be a class legal rocker the hull will match the defined hull shape drawing or be within the tolerance range.

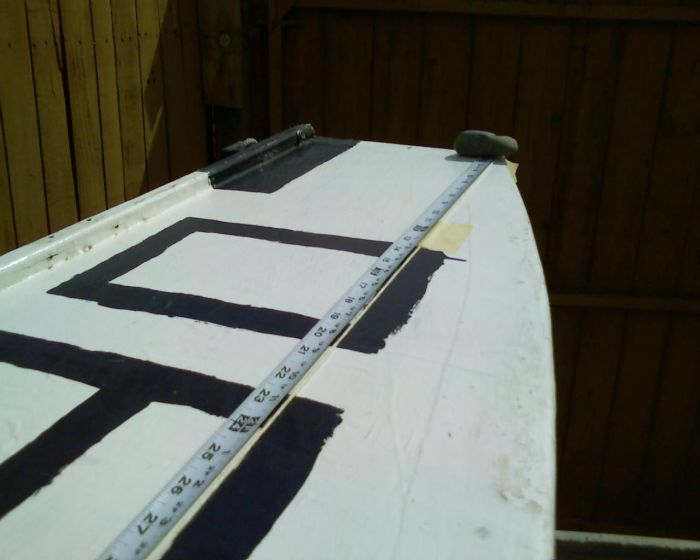
Step 1 - Affix "String Line"
The "end points" are the corners where the bottom meets up with transoms. Affix a string between the bow and stern end points.
The picture shows masking tape being used because I was working alone to take the photos, it is much faster to have volunteers hold the string for you.
Step 2 - Distance Between End Points
Measure the distance between end points, the tolerance range is listed in rule #1.
Step 3 - Calculate Your Horizontal Shift
We are going to use the stern end point to measure the station marks, but first we must figure how far to shift this endpoint. This is because most people cut the rocker from a sheet of plywood and then add the transoms later, this means the hull grows in length from the thickness of those transoms.
The horizontal shift is (length - 90" / 2)
Example:
Shorty used the defined hull shape as a cut plan.
The freshly cut side panel has a distance of 90" between the end points
Then Shorty added a 1/4" thick plywood bow transom, and a 1/4" thick plywood stern transom
The distance between end points is now 90-1/2"
So the length is 90-1/2"
Minus 90" equals 1/2"
divided by 2 equals 1/4"
So Shorty's horizontal shift is 1/4".
This means that Station 1 is 12-1/4" in from the end point
Station 2 is 24-1/4"
Station 3 is 36-1/4"
etc..
Measurement Format "Inches, Eighths"
For the tolerance range, we use "inches, eighths" format like they used to on really old boat plans. It is very simple, the way it works is the dimension is expressed as "inches, eighths".
For example if you have a dimension of 2-1/2 inches, it would formatted as "2,4" meaning 2 inches and 4 eigths. For smaller fractions you round to the nearest eighth.
Here are some more examples:
| 90-1/2" | = 90,4 |
| 2 - 5/8" | = 2,5 |
| 1/4" | = 0,2 |
The drawing to the right shows station 3, and what the measurements would be above and below the defined rocker shape. Note that the negative numbers are more than 6" from the string line.
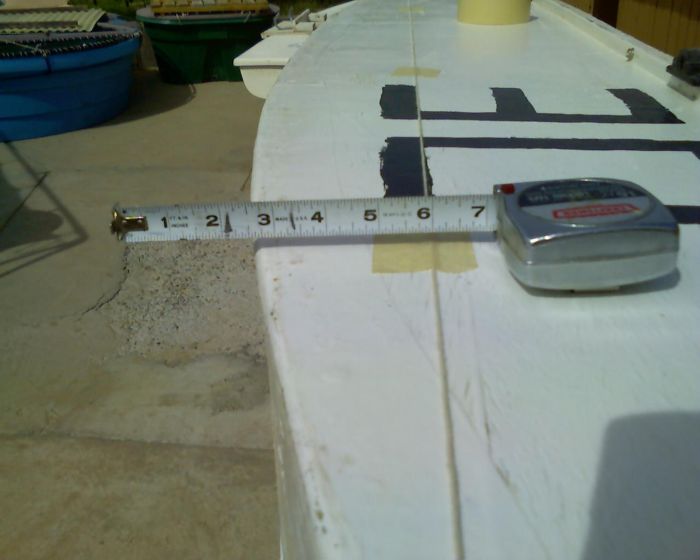
Step 4 - Take measurements at each Station
Go to each station mark and place the 6" mark of your measuring tape on the string and measure where the edge of the hull is.
The reason we put the 6" mark on the string is to mimic the hull shape drawing. The hull shape drawing has people measure and cut from the edge of the plywood that has now been removed. So instead we use the string line which is parallel to where that edge was.
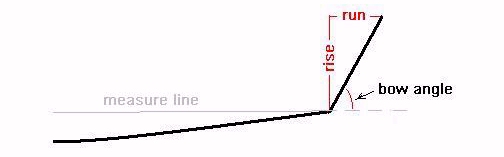
Step 5 - Measure the bow angle
Duckers build various height hulls, but they need to make sure to retain the same bow angle. Here is how to cut the bow angle.
This measurement is to check the bow angle. From the bow end point, we are going to measure "up and over" to the face of the bow transom, which can also be said as "rise and run". If you "rise" up from the bow end point by 4", and then "run" over to the edge of the transom, that will tell us the bow angle. We all are using the same rise "up" dimension of 4", so the run "over" dimension is the one we are interested in to see if the transom is at the correct angle.
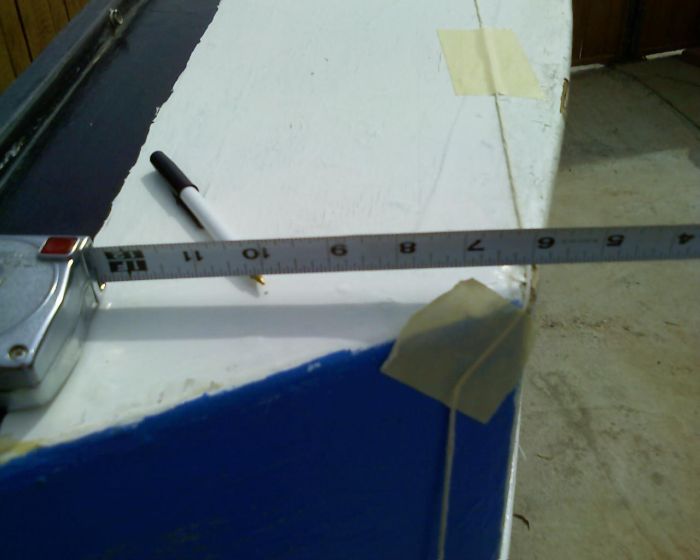
First measure "up"
From the bow corner, place the 6" mark on the string.
Go up on the hull, and make a little mark where the tape reads 10".
It would be better to locate this with a right angle tool, use one if you want, but a measure tape with your best guess of 90 degrees is accurate enough for our purposes.
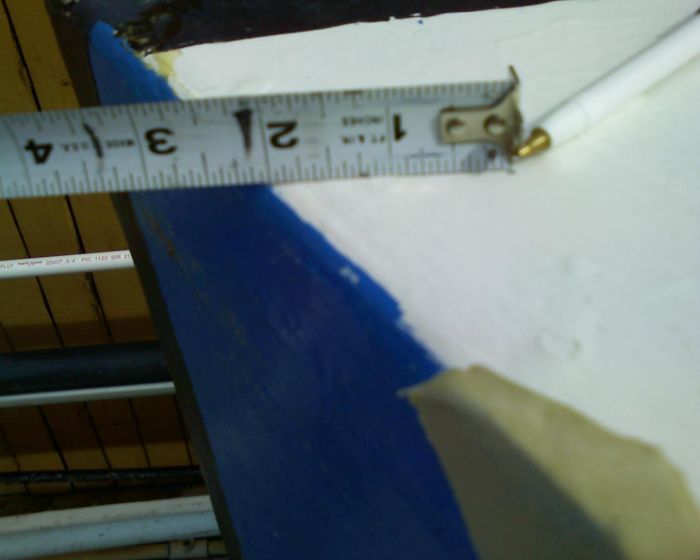
Now we measure the "over" dimension
This is the "over" dimension is what determines if the bow is in tolerance.
Measure from that small mark forward to the bow transom edge.
Round to the nearest 1/8".
3 Volunteer Measuring Method
If you have a crew of 3 volunteers at an event, the measuring process is very quick to perform and can be done in less than a minute. Instead of a string, the volunteers use a measuring tape for the line, and a second measuring tape for the distance from the line to the bottom of the rocker.
volunteer jobs:
1 - hold one end of the "line" measuring tape
2 - hold the other end of the "line" measuring tape
3 - read the distance from the line to the rocker to confirm within tolerance
Measure With Hull Side Template
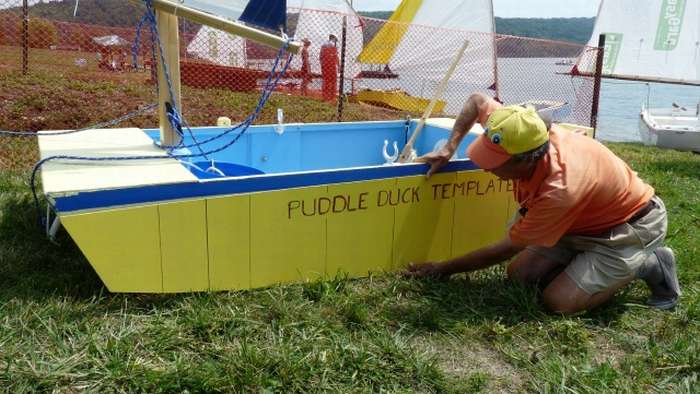
You can use a hull side panel template to make measuring very quick. The problem with the template is they don't tell you if the shape is within the tolerance range, but it WILL tell you if the hull shape is right on.
Something you can do is slap a template on the side of a hull and if it matches, then presto you know the rocker is fine. If it doesn't match, you can pull out 2 measure tapes measure to confirm it is within the tolerance range.
Measuring Hull With Full Length Side Fins
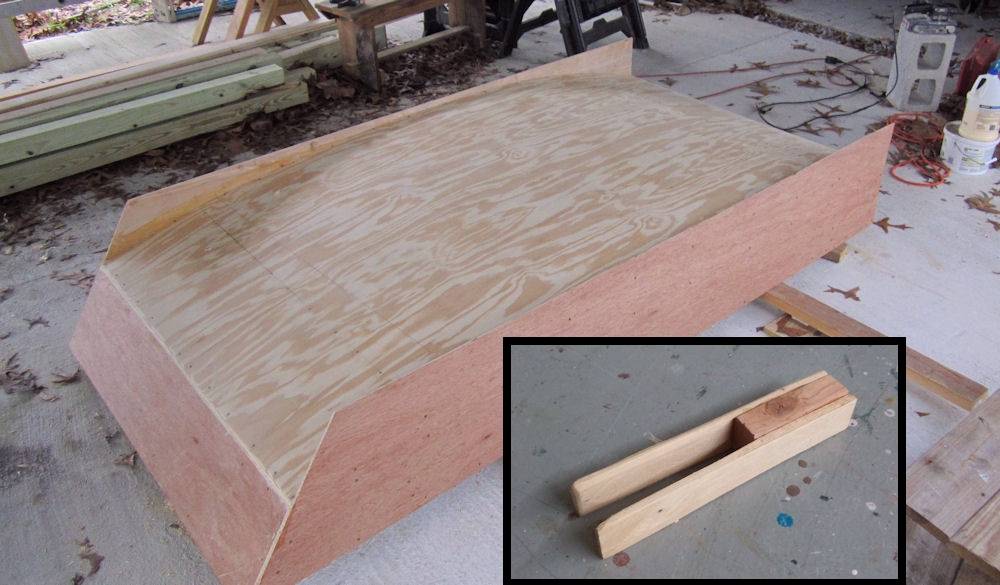
A number of pdracer hulls have been made with fins that extend the full length of both sides of the hull. There is a simple way to measure the rocker on these type hulls, you make a tool that looks like a tuning fork (shown in the inset picture). You place one of the tines of the fork on the inside of the fin, against the rocker. Then you can measure where the tine is on the outside of the hull.
Hull Measuring Comb
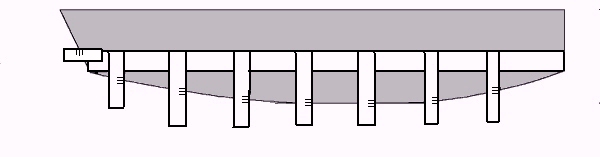
The Hull Measuring Comb is a simple jig that mimics all the steps of measuring a hull with the string method. Place the straight bar on the end points and the teeth have the tolerance range marked on them and will tell you if the rocker is within class legal tolerance.
NOTE: Most wooden boards have a slight warp to them and can easily deform due to humidity, temperature or storage conditions, so it would be best to use some kind of aluminum or steel bar as the straight edge.