
BucketEars - Assemble to make 3D boat
Boat building proverb from my good buddy Tim Webber: Starving a joint of glue is a shame. A 50% loss of glue is perfectly acceptable, and easily mopped up with paper towels. I took that advice to heart, and whenever I glue, I really pour it on, especially since it is so cheap. Like $14 for a gallon of Titebond II.
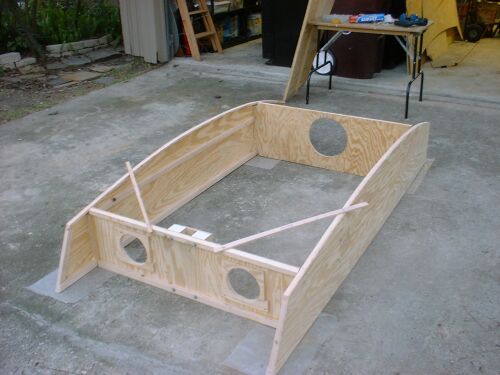
Because the chine logs are on the inside of the sides, I notched the corners of the bulkheads to fit between the framing logs. I slathered on lots of glue, and clamped the bulkheads in place, then drove several screws in each.
I squared up the hull as best I could, then drove in a couple of temporary braces. It is only 2 sticks and 4 screws, but these diagonal sticks holds everything in place so I can attach the bottom. The sticks are later removed just before that section of the bottom is nailed on.
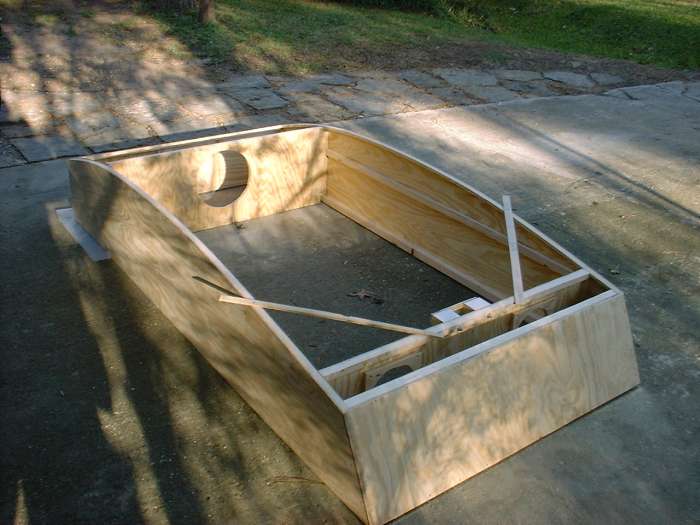
I attached on the bow and stern transoms, then sanded all the surfaces that would contact the bottom. You can re-check that the hull is square by measuring diagonally across the the corners. The length between opposite corners will be the same when measuring both sides.
Don't forget to mark where the bulkheads are on the outsides, so when the bottom is laid on, the nails or screws you drive will land into the chine logs of the bulkhead.
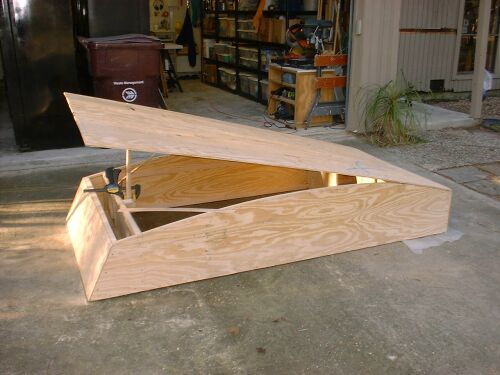
There is a trick to putting the bottom on, you can't bend it all at once. You need to attach the stern first. Then you glue and nail (or screw) the bottom as you go forward, and attach only a few inches on each side at a time. Continue going forward a few inches at a time using lots of glue.
The picture shows a neat trick if you are working alone, I propped one end of the plywood with a stick. As I attached the bottom and moved forward, I lowered the stick so the weight of the plywood would help make the bend.
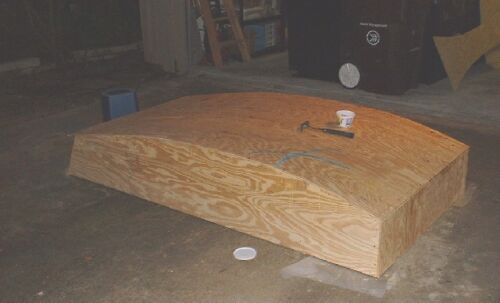
And here she is 3D !!!!
When first putting the bottom on, it will seem like the plywood wants to spring back into it's original shape of being flat. After the plywood has been attached to the bottom for a while, it will accept the shape of the bottom and no longer be under tension trying to spring back.
Also when first putting the bottom on, the fasners (screws or nails) are holding the bottom on. After the glue is cured, the glue does the majority of the work to hold the bottom on, thats why I keep saying to really slather the glue on.
If you used bronze ring nails and/or stainless screws to attach the bottom, you just leave them in place and move on. Sometimes people use treated deck screws or other steel screws that may rust later on. Some duckers remove these screws and then put glue and a toothpick into the hole. After that glue has cured, can sand it flush.
You can leave those screws in place. After being epoxied and painted over, they may rust and some discoloration may come through the paint, but also there is a good chance that there will not be any rust stains showing through. For me personally, I leave the screws in.

Time to add the stringers, these are long skinny boards that run lengthwise on the hull. They stiffen up the hull so as you are sailing, the bottom won't flex as much. This is called oil canning. They also protect the bottom from when you drag her up on a boat ramp, or on a beach.
The way to install the stringers is easy -- just mark where they go, put a LOT of glue there, and drive screws through the stringers into the bottom to hold them in place.
After the glue is cured, remove the screws and fill the holes with glue and a tooth pick.