
Shape Your Keel
Shaping your board
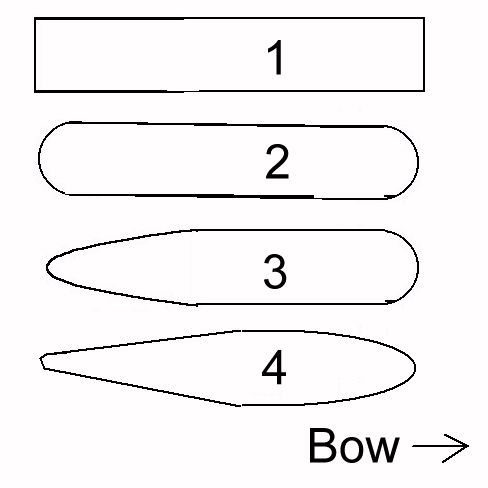
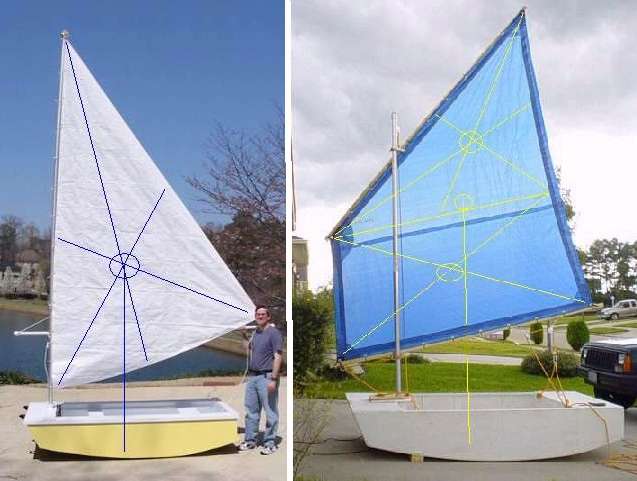
If your foils (fins, keel, daggerboard etc) is not shaped, it will produce drag, which slows your boat down.Shape 1 is just a plain board. This will produce a lot of drag in the water, and you can feel it.
Shape 2 is a plain board with the edges rounded off. This won't be as bad as #1, but it is still pretty bad. Once you start moving at speed, the board will start to vibrate, causing even more drag.
Shape 3 is a board that has a rounded leading edge, and the aft edge is sharpened like a knife blade. This shape is far superior to shapes 1 and 2, and is easy to make.
Shape 4 is a full foil shape (sorry for the poor drawing) and does perform better than shape 3. If you google NACA foils, you will find various formulas and dimensions of what various people think are optimum.
There is a lot of hype surrounding foil shapes, and while there is a huge performance difference between shapes 2 and 3, there is not so much of a noticable difference between 3 and 4.
Size of Leeboard
The most common rule of thumb for sizing the underwater portion of your keel is 5% of the sail area size. So if your sail is 60 sqft, then the fin should be around 3 sqft.
High -VS- Low Aspect Boards
Fins that are deep and skinny are called "high aspect", and have less drag to them. Fins that are short, but are long fore to aft, are called "low aspect" and create more drag for the same square area.
Types of Boards and Keels
Side Daggerboard
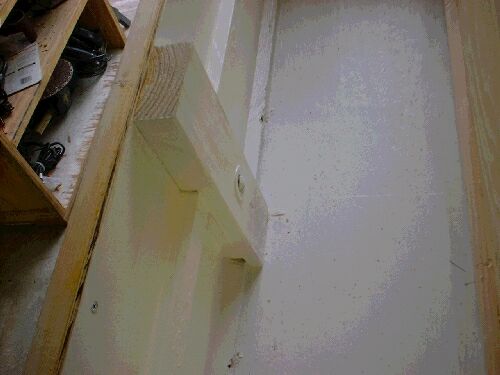
The easiest board to make and install is a side daggerboard. All you need are a couple of strips of wood bolted to the side of your boat and then slide the board down.
If you change the sail plan you are using, you can move the external trunk forward or aft to match it. You can even have one trunk on each side of the boat, so you use the apropriate one with the sail rig you picked for the day.
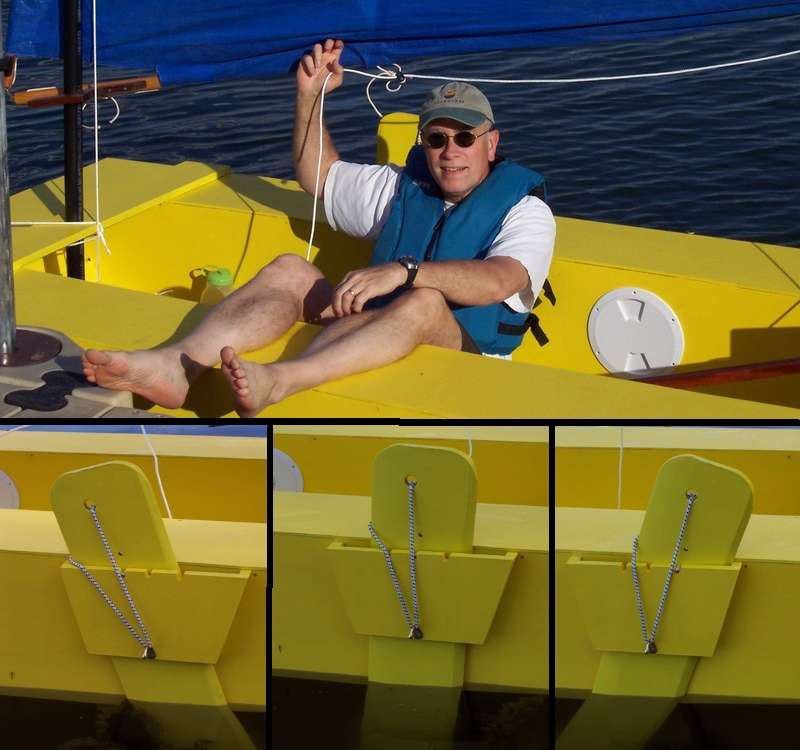
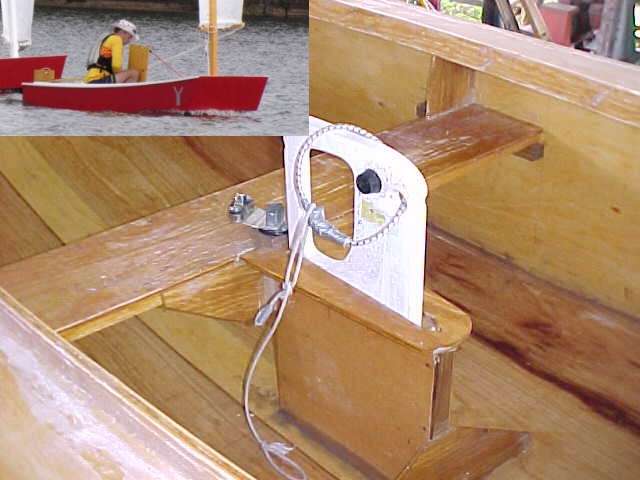
Paxton Pivoting Side Daggerboard
Bill Paxton built #430 "Joy", and wanted to use several different sail rigs on his duck, and wanted to have a way to adjust his daggerboard. He came up with this neat V shaped external trunk so he can pivot the board forward or back to match the sail he is using. The board has a pin sticking out which holds it in one of the slots, and the bungee holds it down in place.
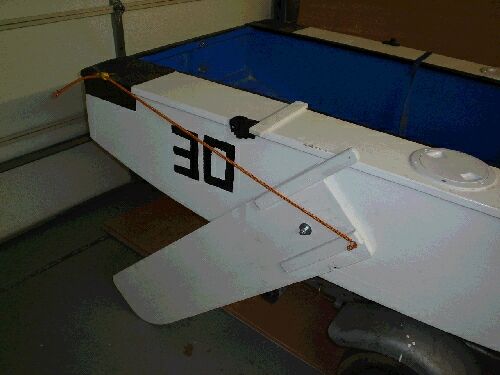 Pivoting Leeboard
This is the most popular board used on ducks -- very simple to install, very functional board - and it seems to be one of the most popular types of boards amongst other plywood boats in the building hobby. The board pivots around a bolt.
To hold it down, the simplest thing to do is attach a bungee cord. A more common solution is to add lead to the blade so it stays down by gravity (this is what I do).
The inside of the hull needs to be reinforced to accept the great force that is placed on the pivot bolt. If you plan on having multiple sail rigs, you can place several backup boards along the inside of your hull, so you can move the board forward or aft as needed.
 Daggerboard
On factory sailboats, this is the most common type of board used, a centered daggerboard. The trunk is easy to make, basically a box, but it is very important that you have some type of structure at the top of it to link it back to the hull. This is Ken Abrahams's hull #2 Ugly Duckling, notice the seat that goes across and how it is attached to the trunk.
The biggest complaint about centered daggerboards is that they get in the way, and people are always banging their knees on them. I know it looks odd putting the boards over on the side of the boat instead of the middle, but a board on the side really works just as good as one in the center.
 Centerboard
Like a daggerboard, it has a trunk, but the trunk is very long so that the board can pivot up inside the trunk and fit inside it. The great advantage is that if you hit something underwater, the board will automatically swing up into it's trunk.
For the ducks that have these, they often build the trunk in a full length side airbox. That way the center of the cockpit is open, but the board is still almost in the middle.
Elephant Ear Leeboard
This is the oldest types of board, basically it is a board that is hung on the gunnel by a piece of rope, and a 2nd piece of rope hoists up the aft edge. You need 2 of them, as you tack, you drop the board that will be on the leeward side (down wind side) and pull up the windward side.
The boat presses itself against the board, and friction keeps it in place. You will need to either melt or pound lead into the bottom of the board to make it heavy enough to sink on it's own.
If you don't pull up the windward board, it will flop up and down in the water (called chicken winging) as you sail.
 Bilge Keel
This is a long short keel that runs along the length of the hull.
 Bilge Boards
Very popular for other boat types in England, the bilge boards are either 2 or 3 short keels that are permanently mounted on the bottom of the hull. They are great for very shallow water, or for having a keel that you don't have to worry about putting up and down.
 Full Length Bilge Boards
Same idea as the bilge board, but the sides of the duck are extended down to form the bilge boards.
 Wierd Configurations
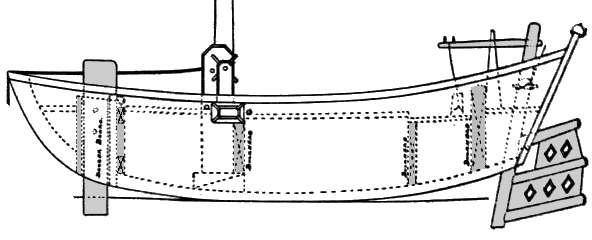
Shown to the right is a simple example of a chinese junk, where the daggerboard is forward of the mast, and it also has a balanced rudder (meaining a lot of the rudder blade is forward of the pivot point). They setup the boats like this to maximize the interior volume for cargo, keep it free of obstructions and other reasons. A friend of mine built a dinghy setup like this, and I got to sail her at a messabout and can confirm what the chinese have known for thousands of years, it works!
This is just one example of what a modern sailor might think is "wierd", but if you understand the forces at work, there are many other types of keel configurations that work just fine.
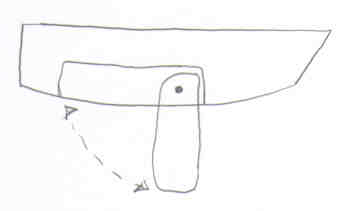
Where To Put Your Leeboard
A general rule of thumb is to place the leeboard (or center of your keel area) is typically placed at or just forward of the center of your sail area.
But really with the custom sails we build, there are other factors that will change where the optimum location of the leeboard is placed and you will need to do real world testing with your sail to find the best location. More info on the design your duck page.
Melting Lead
For the swinging boards, you can use bungees or other means to hold them down, but often people melt lead into the board to make them sink and hold themselves down.
DANGER:
Melting lead creates toxic fumes!!!
Also if you place wet lead into a pan of molden lead, the moisture will instantly vaporize and make the lead explode !!!
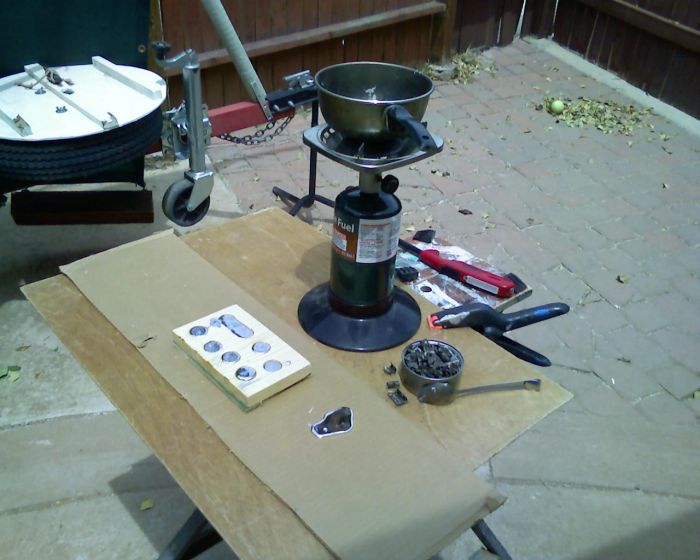
I get wheel weights from the local tire shop. The way I melt lead is very simple, I use a small camp stove and a pan I bought from the thrift store. When the lead melts, I use a spoon to skim the steel clips and other crud from the surface of the molten lead. Then I can pour the lead like it was soup.
The picture to the right is when I was making a block of lead cylinders for a friend of mine who doesn't like to melt his own lead.
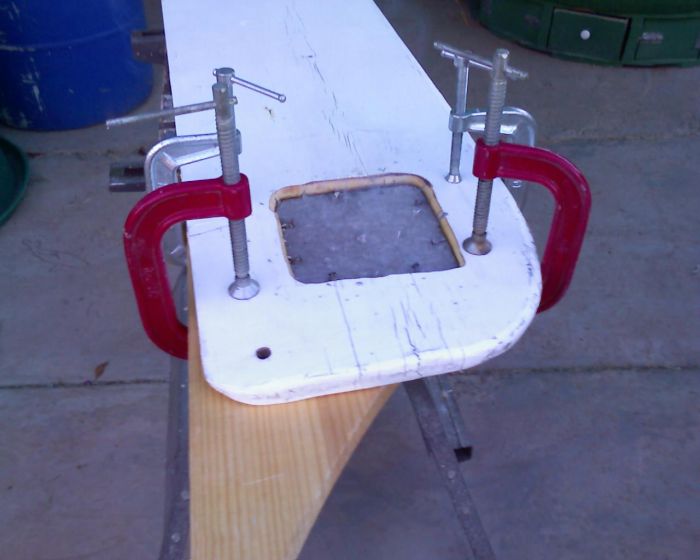
This is how to melt lead into a leeboard.
First you measure the square area of the board that will be submerged.
Calculate what 7% of that is, and then cut a hole of that size near the bottom of your board.
Use a router to round off the edges.
Drive some nails into the board and have the heads pointing towards the inside of the hole.
Clamp on a backing board.
Then melt and pour lead into your hole.
It works best if you can pour all of the lead at one time, but since I use a small pan, I usually do several consecutive pours.